
 LOGIN
LOGIN Downloads


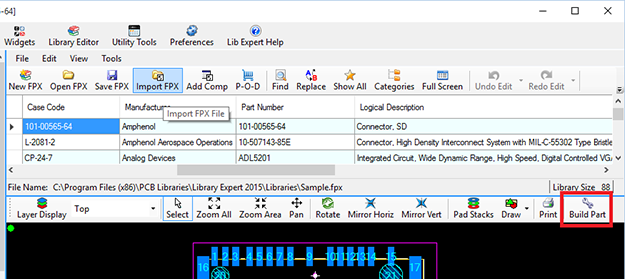
From within the PCB Libraries Expert product, once your footprint is as
required, press the Build icon. This displays the Create Footprint
dialog from where you can export to the desired format.
Select Pulsonix from the Translator: drop down list.
Select the Output Directory: required using the browser button.
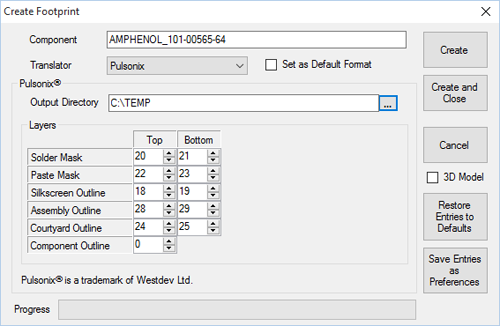
From the list of editable Layers, you should add your own required layers for Top and Bottom. These can be edited to your liking but should match your Pulsonix Technology Layer names. These preferences can be saved for future use using the Save Entries as Preferences button.
When the Layers have been added, click either the Create or Create and Close buttons to save the Pulsonix .plx format file.
Importing the .plx file into Pulsonix
Now that you have a .plx file, you are ready to import this into your Pulsonix library.
Run Pulsonix. From the Setup menu select Libraries or select the Libraries icon from the toolbar.
From your Windows Explorer, locate the saved .plx file.
Select the .plx file and drag it onto the
Pulsonix Library Manager. You can
drop the file onto any of the symbol or Parts pages, Pulsonix will
automatically detect that the file from PCB Libraries is a PCB Footprint.
When dragged and dropped, Pulsonix will display the Footprint Library Transfer dialog from where you can choose a Technology file to use on import if required.
Press OK to continue.
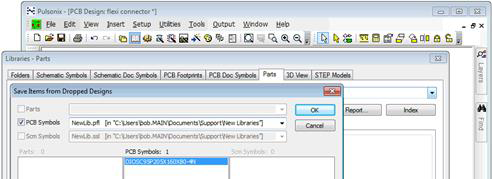
Pulsonix knows that the .plx file exported from PCB Libraries is a PCB Footprint only file and as such, only allows you to create a new footprint for it.
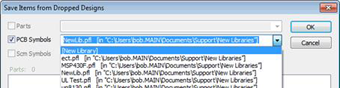
Select the PCB Symbols check box to import the footprint into. At this point, you can choose an existing Footprint library file or select to create a new library.
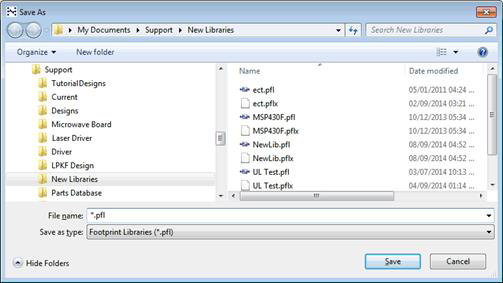
If you need a new library, from the drop down list next to PCB Symbols,
choose [New Library].
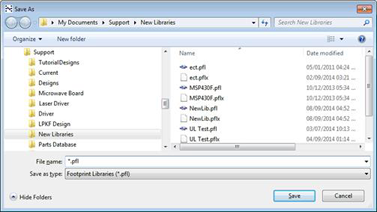
When you press OK, the Save As dialog will be displayed
in which to type in a new Footprint Library name.
Select the actual PCB Symbol(s) name from the PCB Symbols list.
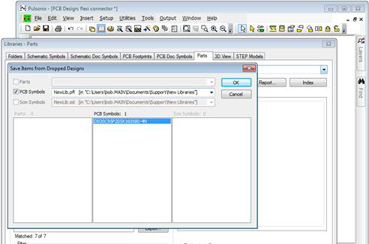
With the Library selected and the PCB Symbols selected, press the OK
button to import the footprint. A confirmation dialog is displayed to show how
many PCB Symbols have been imported.

In the Library Manager and PCB Footprints tab, your new footprint will be show in the Contents list ready for use with a Part definition.
