
 LOGIN
LOGIN Downloads


These instructions show how to import library parts into PADS Professional Library Manager. This will be broken into two parts. The new Direct Import instructions as well as ASCII import for older versions of PADS Professional.
1. If you do not already have a central library, create one by selecting File > New from Library Manager. If you already have a central library select File > Open or select your library from the list of recently opened libraries. If you already have cell partitions for importing PCB Footprint Expert parts, go to step 3; otherwise, create new partitions...
a. Run "Setup | Partition Editor..." command
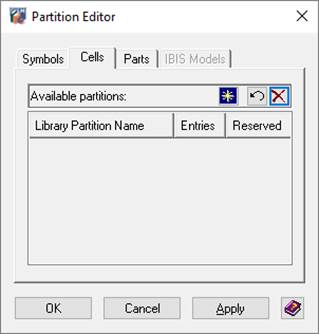
b. Click the New Partition icon  ,
key in a name for the cell partition name and click Apply
,
key in a name for the cell partition name and click Apply
c. Create as many Partitions as you desire
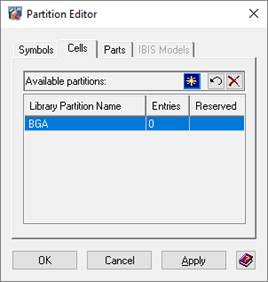
d. Click OK
2. Click Library Services icon 
a. Before you import Cell data files you must import Pad Stacks data files
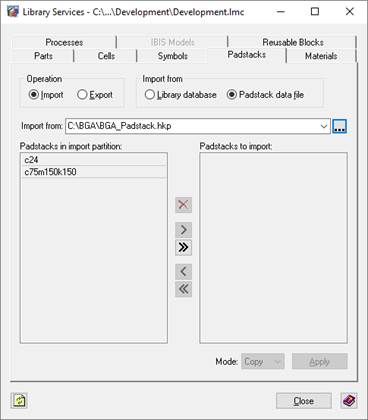
3. Go to Tools -> Library Services. Select the Pad Stacks tab inside the Library Service window.
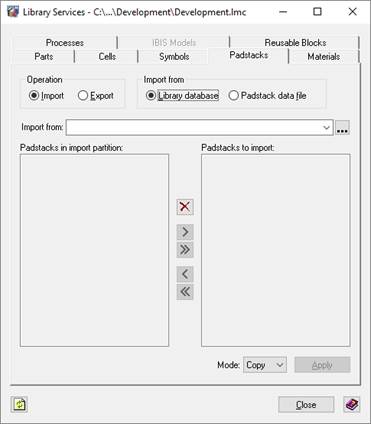
a. Select Import from the Operation section and select 'Pad Stack data file' from the Import from section
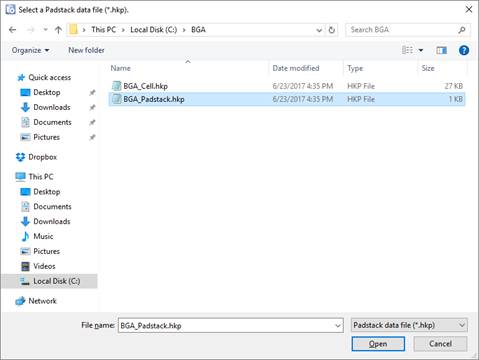
4. Click the Browse icon  , and select the 'Pad Stacks
data file'. Select the Pad Stack HKP File and click Open.
, and select the 'Pad Stacks
data file'. Select the Pad Stack HKP File and click Open.
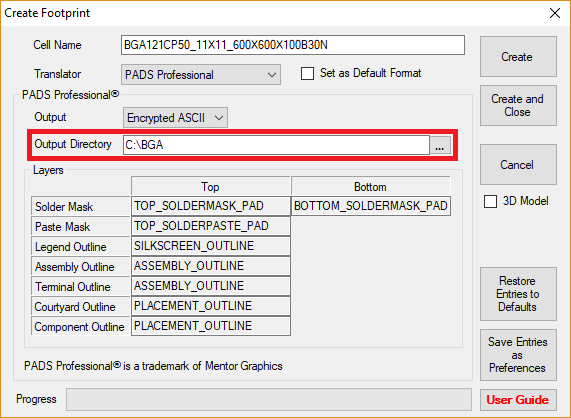
a. All Footprint Expert PADS Professional Output is created in the
folder specified by "Output Directory"
5. All of the available pad stacks will be displayed in the left panel
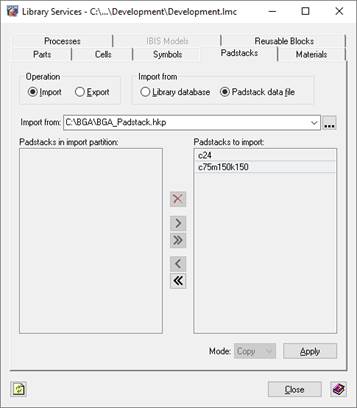
6. Use the double arrow button to move all the available pad stacks to the right panel, and then click Apply
to import them
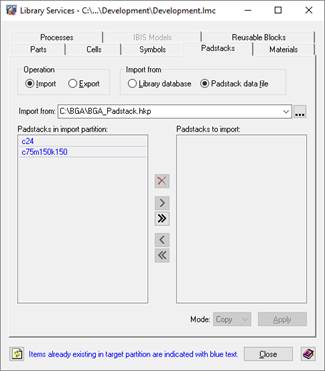
7. If these Pad Stacks are now in your Central Library, they will be indicated in blue
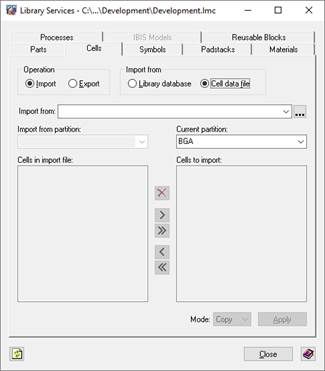
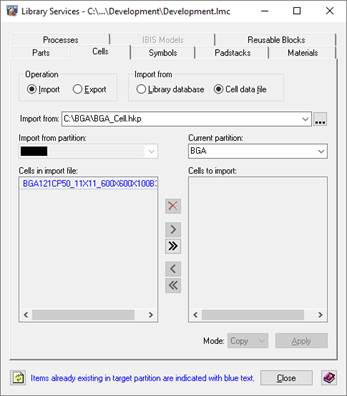
8. Now it's possible to import cell data files
a. Select the Cells tab, and then select Import from the Operation section and 'Cell data file' from the Import from section.
b. Choose the destination Cell Partition where to copy cells.
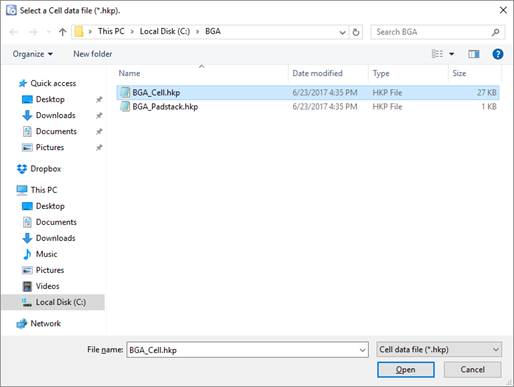
9. Click the Browse icon  , and select the 'Cell
data file'. Select the Cell HKP File and click Open.
, and select the 'Cell
data file'. Select the Cell HKP File and click Open.
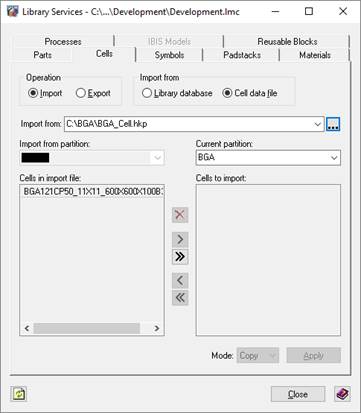
10. All the available cells will be displayed in the left panel.
11. Use the double arrows to move all the available cells to the right panel, and then click Apply
to import them.
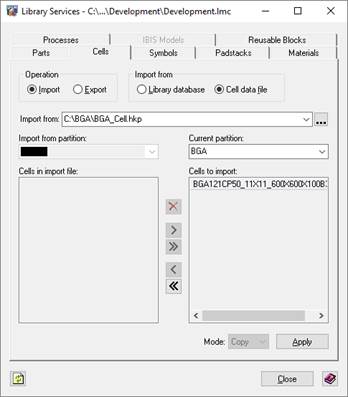
12. If these Cells are now in your Central Library, they will be indicated in blue.
The cells and pad stacks have now been imported and are ready to be used.
Import Instructions - BINARY
(Preferred export is via encrypted ASCII specified above as the binary method requires two licenses of the Mentor Library Manager)
1. If you wish to import into an existing library, you must ensure there are no naming conflicts between the cells you are going to create, and the cells that are in the existing library. If any exist, and you wish to overwrite them, you must manually delete them from the library first. There should be no cells in the library manager with the same name as the parts you are generating when you are done.
2. The safest method is to simply import into a new library. In order to do this, open
PADS Professional Library Manager.

3. Select File/New, select the directory where you want the new library to go, and hit
OK.
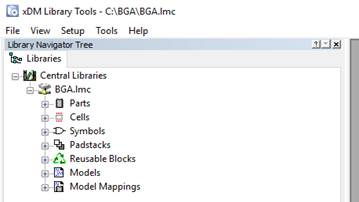
4. You must now create a cell partition. Select Cells, Right Click, and Select 'New
Partition'.
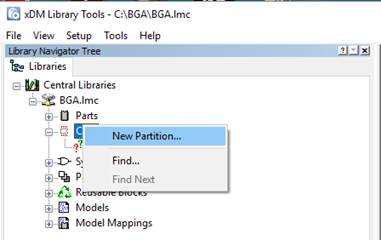
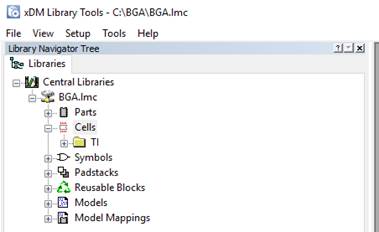
5. Enter a partition name for the parts, if it's a library you're converting, simply use
the Library Name and hit OK. The library that will be imported to is the TI
library folder.
6. At this point, run the translator, select PADS Professional, select Direct Import, set the library name to this library (it will change the library directory automatically), and hit Create. The translator will now import the parts into the newly created library. Once again, you can do this with an existing library, you simply must ensure that no cells you are creating currently exist in the existing library. Simply delete them manually or start a new library.
