
 LOGIN
LOGIN Downloads


The instructions show how to import a footprint with small outline and thermal tab, which you received from the PCB Footprint Expert software, into the eCADSTAR Footprint Library in 10 steps:
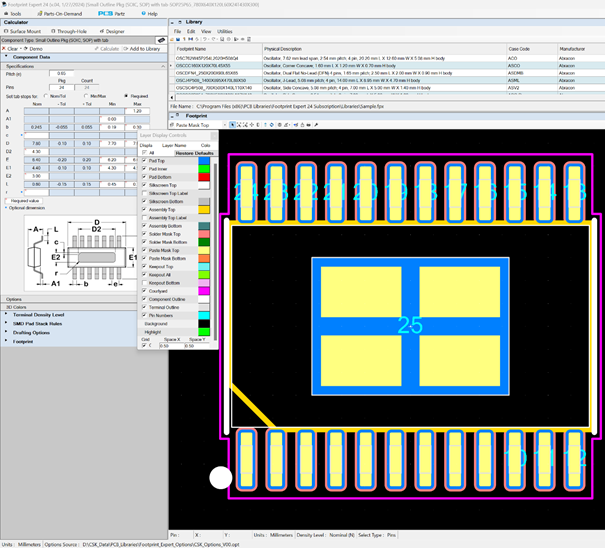
1. This image shows which footprint has been selected in the PCB Footprint
Expert software.
2. The desired eCADSTAR layer designations can be stored directly as standard in the PCB Footprint Expert software. Note: eCADSTAR can import the optional 3D step model directly into the eCADSTAR Footprint Library.
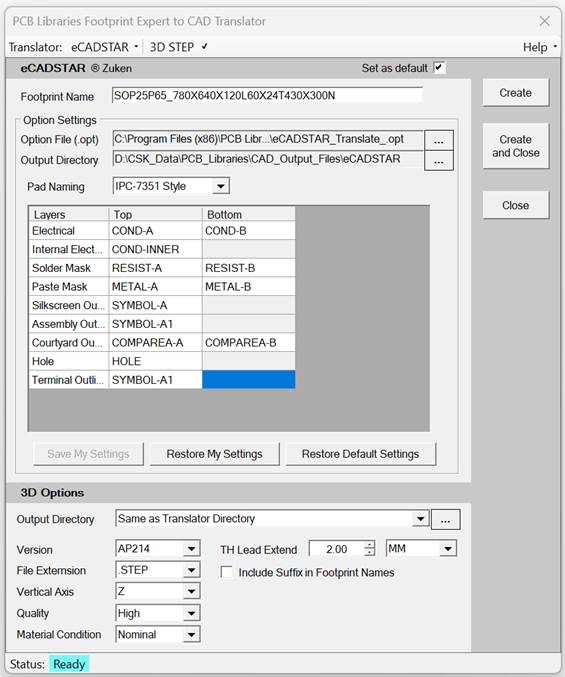
3. When exporting, the PCB Footprint Expert software creates a zip file in the selected output directory, which contains the footprint and optionally also the 3D step model.

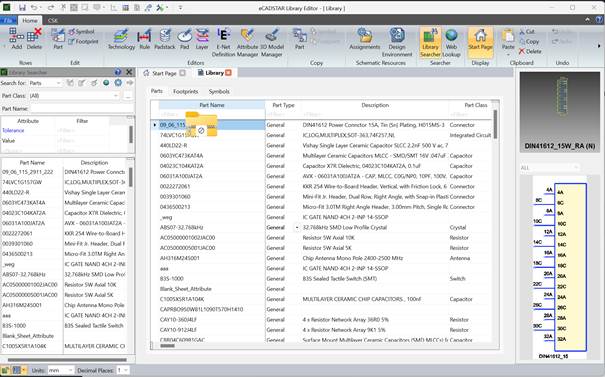
4. The exported zip file from the PCB Footprint Expert software can be inserted directly into the eCADSTAR Library Editor application using drag and drop. This means you drag the file into the tabular work area of the eCADSTAR software.
5. If the content of the zip file still needs to be adjusted, a �Library Mapping� window will automatically open in the eCADSTAR software. In this window the mapping is carried out, for example for the following points: individual objects such as pad, silk, assembly, solder resist and the paste mask.

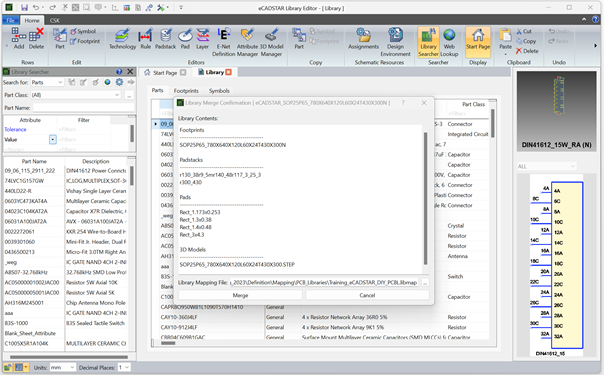
6. After successful mapping, a summary of the imported content appears in the "Library Merge Confirmation" window, which can be finally imported by clicking on "Merge".
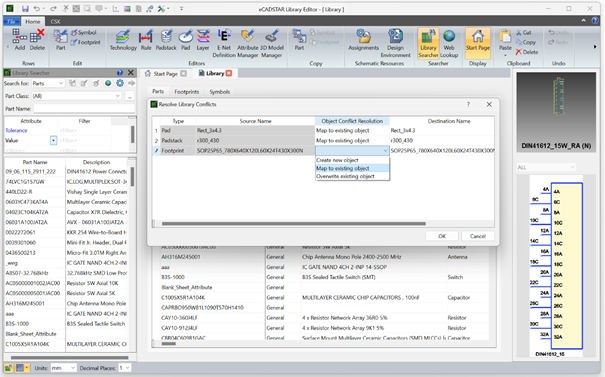
7. If a data record with the same name already exists when the data is imported, a �Resolve Library Conflicts� window will automatically open in the eCADSTAR software. In this window you can, for example, select whether the existing type should be overwritten, used or newly created.
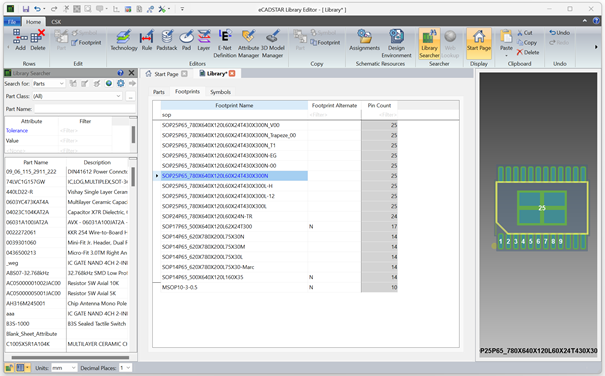
8. After the mapping is successful and the footprint has been imported into the eCADSTAR Library Editor application, the new footprint will be highlighted in blue. In order to finally complete the import, the change to the Library Editor application in eCADSTAR must be confirmed using the save function. After successful saving, the footprint that was previously highlighted in blue will also be displayed in black.
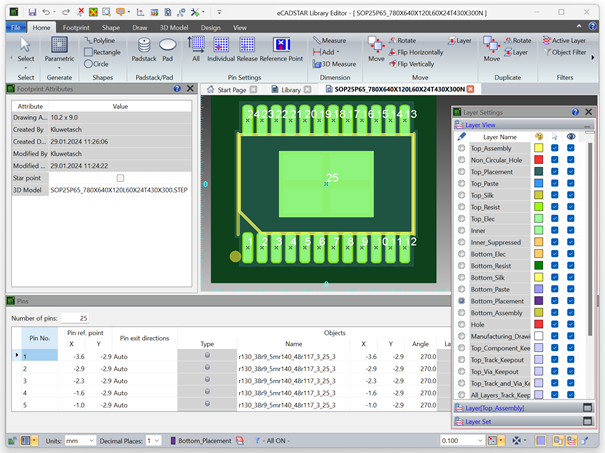
9.
If a 3D step model was also included when importing a footprint file
from the PCB Footprint Expert software, you can check the import of the 3D step
model in the eCADSTAR software. To do this, right-click on the imported
footprint in the eCADSTAR software and select �Edit Footprint�. The footprint
will then be opened in its own tab and you can see in the "Footprint
Attributes" area whether the exported 3D step model from the PCB Footprint
Expert software is stored in the "3D Model" attribute.
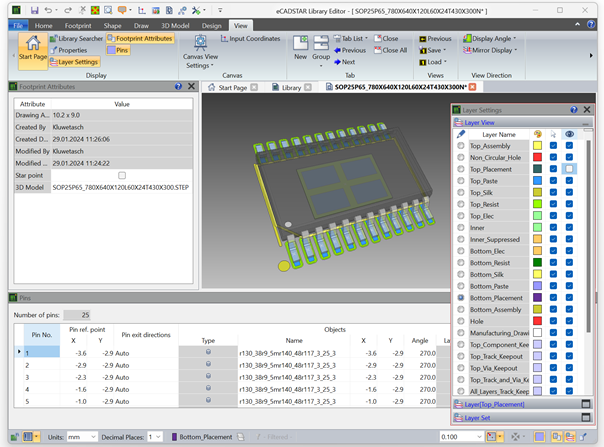
10. In the footprint tab from point 10 of these instructions, with the footprint
selected you can activate the 3D view of the 3D step model by clicking on the
mouse wheel. Note: If the footprint is not displayed correctly, deactivate the
"Top Placement" location in the "Layer Views" under the
"Layer Settings" so that you don't just get the raised courtyard
display.
The import of a footprint including a 3D model from the PCB Footprint Expert software from PCB Libraries into the eCADSTAR software from Zuken has now been successfully completed.
